티스토리 뷰
(공부 책 : Vue.js Quick Start )
스타일 적용
각 요소마다 스타일을 일일이 지정하는 것은 무척 비효율적인 일입니다.
만약 스타일을 바꾸려 한다면 모든 요소의 스타일 특성을 변경해야하는 문제점이 발생합니다.
때문에 예전부터 개발자들은 style 클래스를 미리 지정하고 이를 HTML 요소에 바인딩하는 방법을 사용해왔습니다.
그렇게 한다면 style 클래스 정보만 변경하는 것으로 모든 HTML 요소에 동일한 스타일을 적용할 수 있습니다.
한 HTML 요소에 여러 개의 style 클래스를 지정할 수 있는 만큼 적용되는 순서는 꼭 알아두셔야 합니다.
<head>
  <meta charset="utf-8">
  <title>05-01</title>
  <style>
    .test { background-color: 'yellow';  border: double 4px gray; }
    .over { background-color: 'aqua'; width:300px; height:100px;  }
  </style>
</head>
<body>
    <div style="background-color: orange;" class="test over" ></div>
</body>
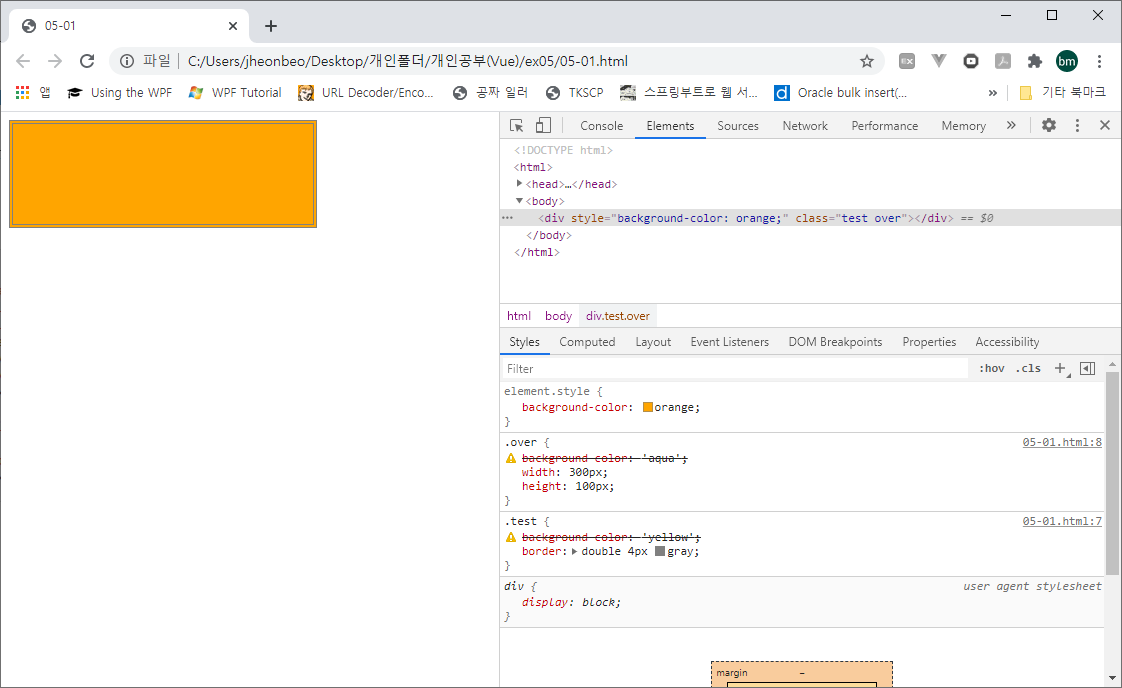
실행 결과를 보면 style 태그에 작성된 순서대로 스타일이 적용된 후 HTML 요소에 적용된 인라인 스타일이 적용됩니다.
같은 스타일 속성이 주어진다면 마지막에 적용된 속성이 적용되고 나머진 숨겨집니다.
1. 인라인 스타일
기존 HTML과 마찬가지로 Vue.js 역시 인라인 스타일 사용을 권장하지 않습니다.
하지만 인라인 스타일이 필요한 경우도 있으니 방법을 익혀보도록 합시다.
Vue.js에서 인라인 스타일은 v-bind:style로 작성합니다. style로 지정할 정보는 Data 속성에 작성하는데
주의할 점으로 스타일 속성으로 케밥 표기법이 아닌 카멜 표기법으로 사용해야한다는 걸 알아야합니다.
또한 속성 구분자로 ; 가 아닌 , 로 구분한다는 것도 아셔야 합니다.
간단한 예제를 통해 확인해보겠습니다.
<body>
    <div id="example">
        <button id="a" v-bind:style="customStyle"
        @mouseover.stop="overEvent" @mouseout.stop="outEvent">테스트</button>
    </div>
    <script type="text/javascript">
        var vm = new Vue({
            el: "#example",
            data: {
                customStyle: {
                    backgroundColor: 'white',
                    border: 'solid 1px gray',
                    width: '100px',
                    textAlign: 'center'
                }
            },
            methods: {
                overEvent: function(e) {
                    this.customStyle.backgroundColor = "black";
                    this.customStyle.color = "white";
                },
                outEvent: function(e) {
                    this.customStyle.backgroundColor = "white";
                    this.customStyle.color = "black";
                }
            }
        })
    </script>
</body>
해당 예제는 버튼에 마우스가 over 혹은 out 할 때 customStyle 데이터 속성을 변경합니다.
변경된 속성은 v-bind:style="customStyle"을 통해 데이터가 반영됩니다.
data 속성에 작성 방법을 보면 카멜 표기법으로 작성되었음을 알 수 있습니다.
번외로 여러 개의 스타일 객체를 바인딩할 수도 있습니다.
위 예제 코드를 조금 변형하여 결과물은 똑같지만 스타일 객체를 나누어 코딩해봤습니다.
<div id="example">
        <button id="a" v-bind:style="[customColor, customLayout]"
        @mouseover.stop="overEvent" @mouseout.stop="outEvent">테스트</button>
    </div>
    <script type="text/javascript">
        var vm = new Vue({
            el: "#example",
            data: {
                customColor: {
                    backgroundColor: 'white'
                },
                customLayout: {
                    border: 'solid 1px gray',
                    width: '100px',
                    textAlign: 'center'
                }
            },
            methods: {
                overEvent: function(e) {
                    this.customColor.backgroundColor = "black";
                    this.customColor.color = "white";
                },
                outEvent: function(e) {
                    this.customColor.backgroundColor = "white";
                    this.customColor.color = "black";
                }
            }
        })
    </script>
스타일 객체를 여러 개로 관리하고자 할 때 위와 같은 방식으로 코딩하면 됩니다.
2. CSS 클래스 바인딩
CSS 클래스 바인딩은 v-bind:class를 사용합니다.
<head>
    <meta charset="utf-8">
    <title>05-03</title>
    <style>
        .style1 {
            background-color: black;
            color: white;
        }

        .style2 {
            text-align: center;
            width: 100px;
        }

        .style3 {
            border: yellow dashed 2px;
        }
    </style>
    <script src="https://unpkg.com/vue@2.6.12/dist/vue.js"></script>
</head>

<body>
    <div id="example">
        <button id="btn1" v-bind:class="{ style1:s1, style2:s2, style3:s3 }">버튼1</button>
        <p>
            <input type="checkbox" v-model="s1" value="true" />style1 디자인<br/>
            <input type="checkbox" v-model="s2" value="true" />style2 디자인<br/>
            <input type="checkbox" v-model="s3" value="true" />style3 디자인<br/>
        </P>
    </div>
    <script type="text/javascript">
        var vm = new Vue({
            el: "#example",
            data: {
                s1: false,
                s2: false,
                s3: false
            }
        })
    </script>
</body>
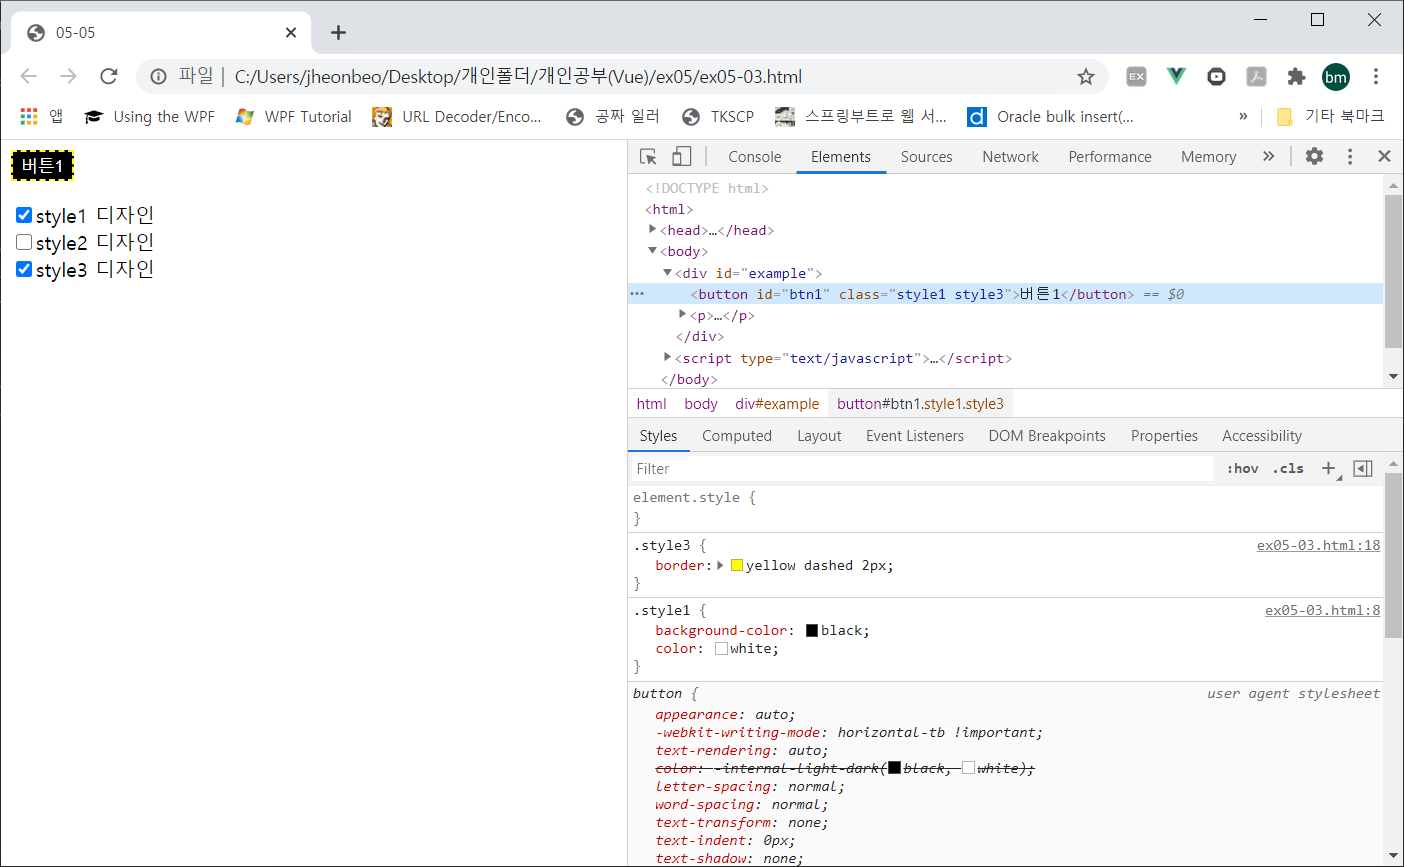
위 예제처럼 v-bind:class를 이용해 적용할 때는 boolean 값을 이용해 지정합니다.
v-bind:class="{ style1:s1, style2:s2, style3:s3 } 와 같은 형태로 각각의 클래스를
v-model로 양방향 바인딩시켜 참, 거짓 여부를 결정합니다.
하지만 매번 개별적인 값을 지정하는건 매우 불편합니다.
클래스명 데이터 속성명으로 사용하면 이런 점을 개선할 수 있습니다.
<body>
    <div id="example">
        <button id="btn1" v-bind:class="customStyle">버튼1</button>
        <p>
            <input type="checkbox" v-model="customStyle.style1" value="true" />style1 디자인<br/>
            <input type="checkbox" v-model="customStyle.style2" value="true" />style2 디자인<br/>
            <input type="checkbox" v-model="customStyle.style3" value="true" />style3 디자인<br/>
        </P>
    </div>
    <script type="text/javascript">
        var vm = new Vue({
            el: "#example",
            data: {
                customStyle: {
                    style1: false,
                    style2: false,
                    style3: false
                }
            }
        })
    </script>
</body>
3. 계산형 속성, 메서드를 이용한 스타일 적용
계산형 속성을 활용해 스타일을 적용할 수도 있습니다.
<head>
    <meta charset="utf-8">
    <title>05-07</title>
    <style>
        .score {
            border: solid 1px black;
        }

        .error {
            background-color: orange;
            color: purple;
        }

        .errorimage {
            width: 18px;
            height: 18px;
            top: 5px;
            position: relative;
        }
    </style>
    <script src="https://unpkg.com/vue@2.6.12/dist/vue.js"></script>
</head>

<body>
    <div id="example">
        <div>
            <p>1부터 100까지만 입력가능합니다.</p>
            <div>
                점수 : <input type="text" class="score" v-model.number="score" v-bind:class="info" />
                <img src="../images/error.png" class="errorimage" v-show="info.error" />
            </div>
        </div>
    </div>
    <script type="text/javascript">
        var vm = new Vue({
            el: "#example",
            data: {
                score: 0
            },
            computed: {
                info: function() {
                    if (this.score >= 1 && this.score <= 100)
                        return {
                            error: false
                        };
                    else
                        return {
                            error: true
                        };
                }
            }
        })
    </script>
</body>
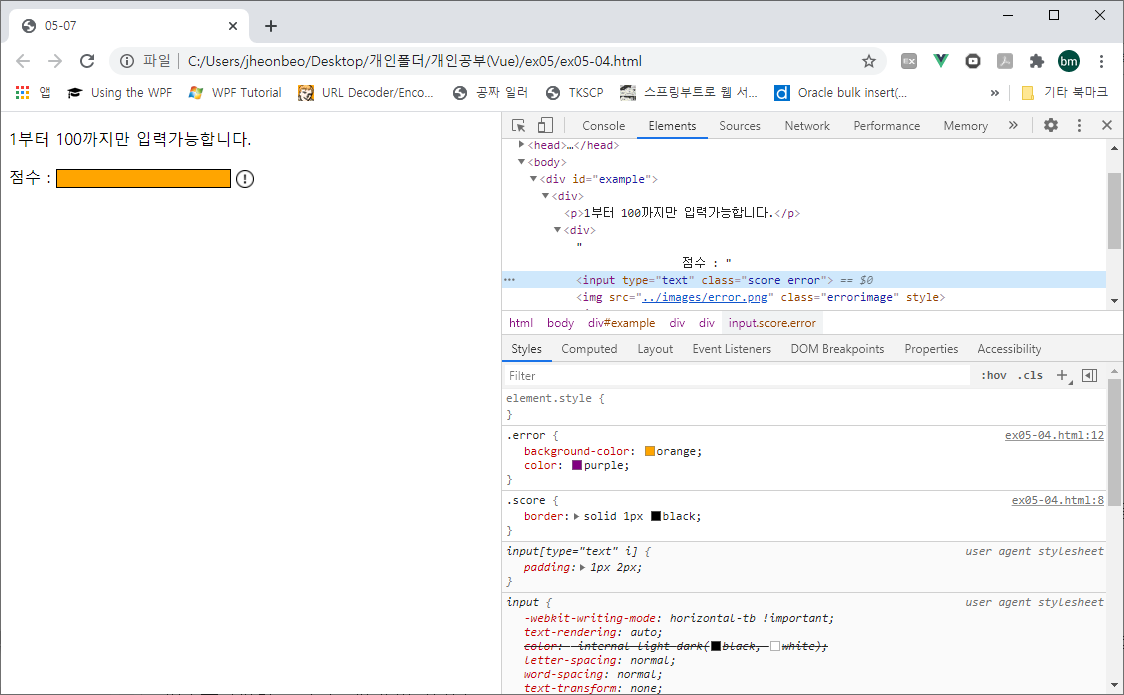
input 요소는 v-bind:class="info" 에 의해 info 계산형 속성이 양방향 바인딩되어
1 ~ 100 사이 숫자가 아니라면 error를 true로 변경해
input에 error 클래스 style을 추가시켜주는 예제입니다.
이는 계산형 속성 뿐만 아니라 메서드에서도 이용 가능합니다.
4. 컴포넌트에서의 스타일 적용
Vue 컴포넌트는 아직 배우지 않은 내용이지만 스타일 한정으로 가볍게 학습할 수 있습니다.
<head>
    <meta charset="utf-8">
    <title>05-05</title>
    <style>
        .boxcolor {
            background-color: white;
        }

        .center {
            width: 200px;
            height: 100px;
            line-height: 100px;
            text-align: center;
            border: 3px solid black;
        }
    </style>
    <script src="https://unpkg.com/vue@2.6.12/dist/vue.js"></script>
</head>

<body>
    <div id="example">
        <test-box v-bind:class="boxstyle"></test-box>
    </div>
    <script type="text/javascript">
        Vue.component('test-box', {
            template: '<div class="center">중앙에 위치</div>'
        })
        var vm = new Vue({
            el: "#example",
            data: {
                boxstyle: {
                    boxcolor: true
                }
            }
        })
    </script>
</body>
test-box라는 이름의 Vue 컴포넌트를 작성했습니다.
위 예제처럼 <test-box></test-box>와 같이 사용 가능합니다.
이미 center 클래스가 적용되어 있지만 v-bind를 활용해 추가로 class를 바인딩할 수도 있습니다.
'Vue' 카테고리의 다른 글
| Vue.js 컴포넌트 기초 - 2 (0) | 2021.06.29 |
|---|---|
| Vue.js 컴포넌트 기초 - 1 (0) | 2021.05.14 |
| Vue.js 이벤트 처리 (0) | 2021.02.25 |
| Vue 인스턴스 (0) | 2021.01.29 |
| Vue.js 기타 디렉티브와 계산형 속성 (0) | 2021.01.22 |
